Mr Yum is an ordering service which allows customers to place orders from their table using their own smart-phone device.
Each table will contain a QR Code that Customers will scan with their own mobile device.
Their device will then display the menu for your Venue from the Mr Yum site and display the items that you have available to order.
The Customer will select the items they wish to order then they'll pay for them from their device.
Once payment has been processed, the order will be sent to the Kitchen Docket Printer (provided that Automatically Send Orders to Kitchen Printers is enabled), ready for preparation by the Chef.
The order will arrive into the Idealpos terminal as a Web Order and will be displayed at the top of the POS Screen (provided that auto-finalise Pre-Paid Orders is not enabled).
This process is all web-based and the Customer does not need to download or install any app on their device.
For more details about Mr Yum, click here to visit their website.
Before continuing, you will require the below details and steps will need to completed:
Once the above pre-requisites have been met, complete the below steps to configure Mr Yum with Idealpos Online eCommerce:
The below steps are to be completed in order to configure the Idealpos Online component of the process.
If the eCommerce tab is already visible, you can skip this step.
In order to use the Mr Yum Interface in Idealpos Online, an ECommerce Interface needs to be added to your Idealpos Online Subscription. Doing this will enable access to the eCommerce tab in Idealpos Online.
If you've already added the eCommerce Interface to your Idealpos Online subscription and can see the eCommerce tab, you can skip this section and move onto the next section below which goes through setting up the Mr Yum Interface.
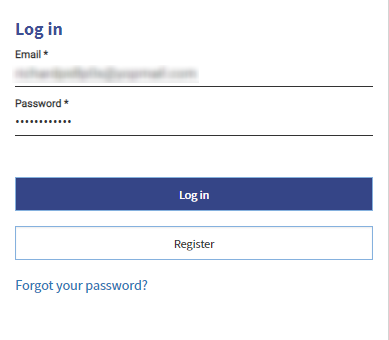
Login to Idealpos Online by going to https://online.idealpos.com.au/app/login
Enter the registered email address and password.
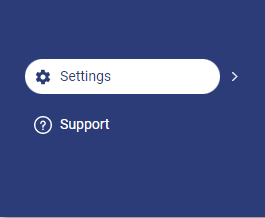
Once logged in, click on "Settings" located at the bottom-left corner of the page.
Within the "Subscriptions" tab, select the "Update Plan" button next to the Subscription that contains the Terminal which will process orders received by Mr Yum.
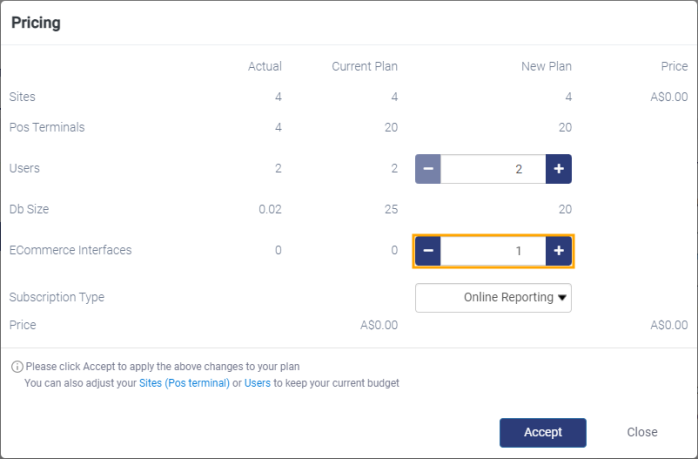
The Pricing screen will appear. Press the '+' button on the ECommerce Interfaces row to increase the ECommerce Interfaces to the number of required ECommerce Interfaces.
If required, the '-' button can be used to decrease the number of ECommerce Interfaces. Typically, you'll use one interface for each POS Terminal, however, it should be noted that it is possible to configure multiple eCommerce Integrations for a single POS Terminal. If multiple terminals will be used to process orders that are placed via your eCommerce site, ensure that you select the required number of ECommerce Interfaces. Press the "Accept" button once you have finished selecting the required number of ECommerce Interfaces.
Shortly after Accepting the change to your plan, you will return to the Subscriptions tab and you will see that the eCommerce tab is now displayed on the far-right side of the Settings page.
Setting up the Mr Yum Interface in Idealpos Online - Entering Settings
After the ECommerce Interface has been added to the Subscription, the eCommerce tab will become visible.
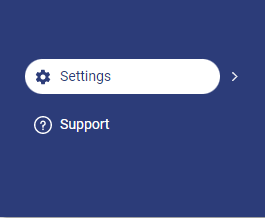
If you aren't already on the Idealpos Settings screen, click on "Settings" located at the bottom-left corner of the page.
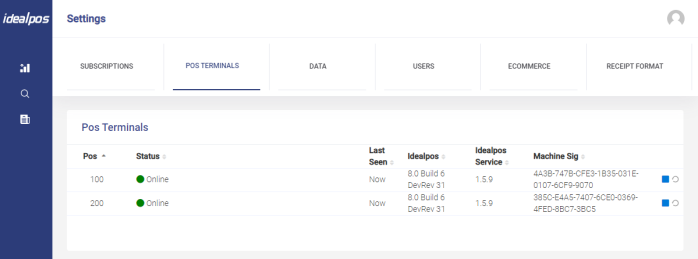
Click on the Pos Terminals tab.
Ensure that the Pos Terminal(s) you intend to use with Mr Yum are currently in an Online state. Should the Pos Terminals appear as Offline, check that they're turned on, have internet access and ensure that the Idealpos Service/Idealpos Upgrade Services are running.
Go to the eCommerce tab.
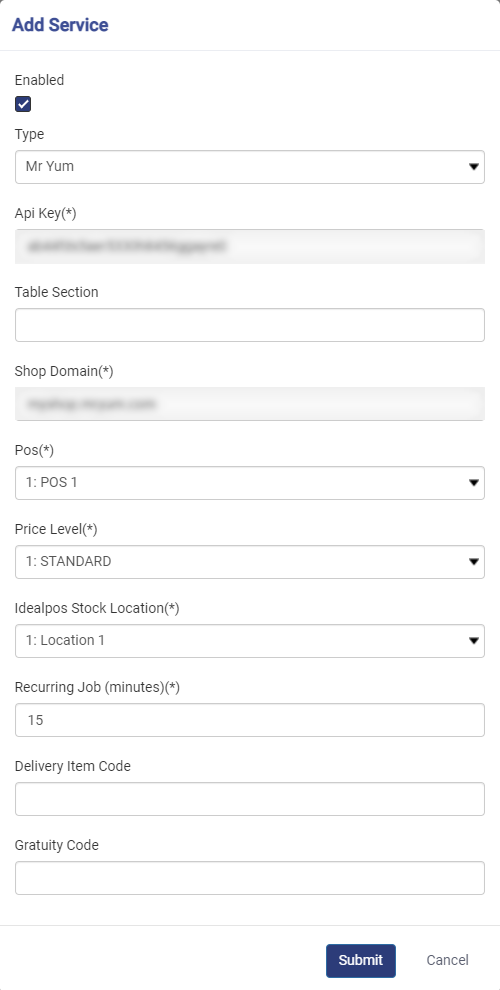
Click on the "Add Service +" button towards the top-right corner of the eCommerce tab to configure the Mr Yum Interface.
The Add Service screen will be displayed. Enter the required settings.
Enabled: Enable Checkbox
Type: Mr Yum
API Key(*): Enter the API Key supplied by Mr Yum
Table Section: Table Section allows orders from a specific Table Section in the venue (e.g. Indoor, Outdoor, Bar, Restaurant, etc.) to be processed to an assigned POS Terminal. By utilising the Table Section functionality, multiple services can be setup in Idealpos Online using the same Location ID. Note that if the Table Section functionality is required, it will need to be setup by the provider (e.g. Mr Yum) and the details will need to be provided to Idealpos to configure within the eCommerce Setup.
- If only one service is setup in Idealpos eCommerce and the Table Section is left blank, all orders will be received by the POS Terminal configured for that service.
- If the Table Section is populated, when eCommerce orders are received by Idealpos, they are checked for that Table Section tag. If a match is found, an order is received. E.g. ROOFTOP. Multiple Table Sections can be added to a single Order Service separated with a semicolon (;). E.g. ROOFTOP; GARDEN.
Shop Domain(*): Enter the Shop Domain supplied by Mr Yum
Pos(*): Select the POS Terminal from the dropdown box which will be used to process orders placed from Mr Yum.
Price Level(*): Select the Price Level that will be used by Mr Yum. The Price Level that is configured here should be the same as the Price Level that is configured in Idealpos
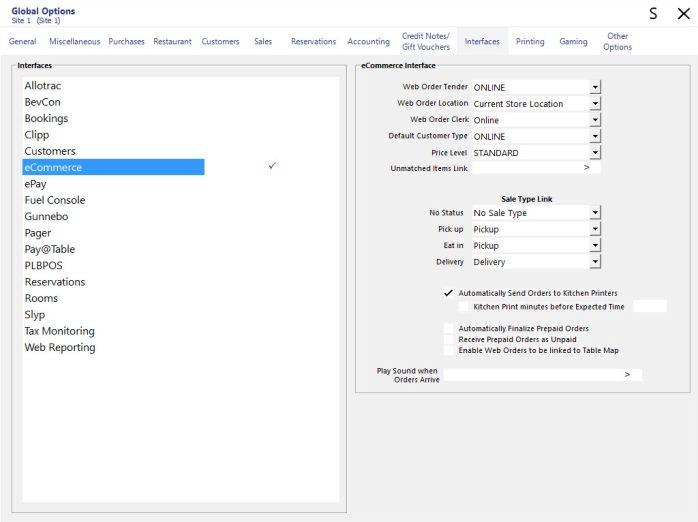
(Setup > Global Options > Interfaces > eCommerce > Price Level).
Idealpos Stock Location(*): Select the Location from the dropdown list where you want Stock Levels to be deducted from for any orders placed by Mr Yum. Note that Idealpos also contains a Web Order Location setting in Setup > Global Options > Interfaces > eCommerce. The Location configured in Idealpos is used for reporting sales.
Recurring Job (minutes)(*): The frequency which Stock Items are synced from Idealpos to Mr Yum.
Delivery Item Code: If using a delivery service to deliver ordered items to a customer, enter the Delivery Item Code which will be used for recording and assigning delivery charges to.
Gratuity Code: Any Tips made by a Customer will be recorded against this code. To utilise this, you will need to create a Gratuity Stock Item in Idealpos, then enter the Stock Item Code into this field.
In addition to the above Idealpos Online configuration, there is also some configuration to be done in Idealpos, all of which is done via Global Options.
Options that can be configured are:
Web Order Tender: Any pre-paid orders received by Idealpos will be recorded against the Web Order Tender selected.
Web Order Location: Select the location where stock is being retrieved from. Typically, this will be the Current Store Location, but it can be changed if required.
Web Order Clerk: Web Orders that have been placed will be recorded against the clerk selected from the dropdown list.
Default Customer Type: Any orders placed by customers from Mr Yum will be assigned against the selected Default Customer Type.
Price Level: The Price Level being used for Stock Items in Mr Yum.
Unmatched Items Link: Any items that exist in Mr Yum which do not exist in Idealpos will be ordered against the Stock Item entered into the Unmatched Items Link field.
Sale Type Link
Idealpos includes the ability to specify Sale Types for eCommerce.
The Sale Types can be selected here.
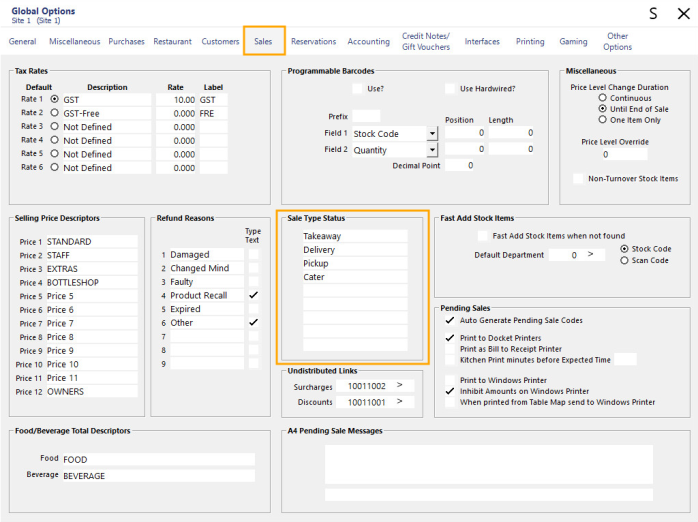
You have the ability to have up to four different Sale Types. If you need to modify the Sale Types available in the list, this can be done via the Sales tab (shown further below).
Automatically Send Orders to Kitchen Printers: When an order is received, it will be printed automatically to the Kitchen Printer. If this option is unticked, you will need to press the Web Orders button at the top of the POS Screen, select the order from the list, then press the Kitchen Print button to print the order to the Kitchen Printer.
Automatically Finalise Prepaid Web Orders: If this option is enabled, any prepaid orders that are received will be automatically finalised and therefore, the Web Orders button will not appear at the top of the POS Screen after an Order is received.
Play Sound when Orders Arrive: If required, a sound file can be specified here and the sound will play each time a Web Order is received by Idealpos.
The recommended settings are:
Web Order Tender: ONLINE
Web Order Location: Current Store Location
Web Order Clerk: ONLINE
Price Level: Retail/Standard (Price Level used at receiving store/location)
Unmatched Items Link: Create an item in File > Stock Control > Stock Items that will be used should Idealpos receive an Item from Mr Yum that does not exist.
Sale Types: Mr Yum supports Pickup, Dine In/Table Ordering & Delivery. We recommend configuring your Idealpos system with the same types supported by Mr Yum. Sale Types can be modified by going to Setup > Global Options > Sales > Sale Types.
Automatically Send Orders to Kitchen Printers: Enabled/Ticked
Automatically Finalise Pre-Paid Web Orders: Enabled/Ticked. Important Note: This will auto-finalise the orders, meaning that a Web Orders button will not appear at the top of the POS Screen after a Mr Yum order is received. Ensure that this what the Venue wants, otherwise, this option can be disabled so they can manage received Mr Yum orders via the Web Orders button.
Play Sound When Orders Arrive: This is optional, but can be configured to draw attention of the Clerk after a Mr Yum order has been received by the POS Terminal.
If the Text Value of the Sale Types needs to be modified, this can be done by going to Sales, then entering the required values under "Sale Type Status".
Once the Sale Type Status text has been changed, navigate back to the Interfaces tab to see the changes.